
![]() by Jennifer Robb
by Jennifer Robb
CoSpaces Edu is a virtual platform that enables you to create and code animations, stories, games, and a variety of other experiences which can then be viewed in augmented reality (AR), virtual reality (VR), or as a 360º experience in your browser window. Like other design and coding applications (e.g., Scratch, MakeCode, Tinkercad), CoSpaces is flexible enough that it can be tailored to almost any age and integrated with any STEAM subject area. Here’s a quick glance at the kinds of things you can do with CoSpaces Edu:
CoSpaces definitely fits the “low floor, high ceiling, wide walls” criteria (Papert, 1980; Resnick, 2017) that we use to evaluate digital maker tools. It has a low floor that it’s easy to get started with, even for younger learners who might only be ready to create three-dimensional (3D) stories and experiences. Its high ceiling comes in the form of coding; specifically, the options for both block-based (CoBlocks) and syntax-based (TypeScript) programming. Even using CoSpaces’ block-coding language, learners have the option to select “Beginner CoBlocks” or “Advanced CoBlocks” to change the number and type of code blocks they have access to. This can prevent beginner coders from becoming overwhelmed by advanced coding concepts. CoSpaces’ physics engine also contributes to its high ceiling, enabling learners to create sophisticated physics simulations, experiment with collisions, and more! Finally, its wide walls are evident in its flexibility; not only can CoSpaces be used to create almost any kind of virtual experience, students can create their own 3D models in a tool like Tinkercad or SketchUp, record their own musical scores, add pre-recorded videos, and so much more.
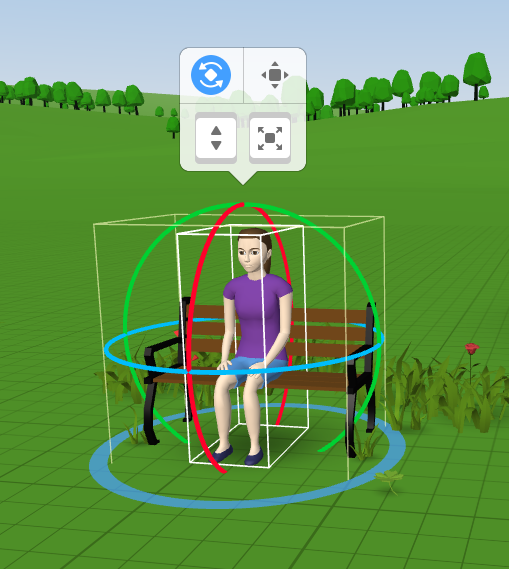
As with any 3D design environment, we personally recommend using CoSpaces Edu on a laptop or desktop computer with a mouse, if possible. While the controls are sensitive enough to be executed without too much difficulty on a touchscreen or laptop touchpad, a separate computer mouse provides more control over any small or precise movements you might wish to make! On that point, if you have limited experience working in 3D design environments, CoSpaces’ advanced translation and rotation tools (pictured below) can be tricky to learn. But, with some time and practice, you and your students will be masters at manipulating objects in three dimensions!
-

- X-, Y-, and Z-Axis Translation of Objects in CoSpaces
-

- X-, Y-, and Z-Axis Rotation of Objects in CoSpaces
How Do I Get Started?

Creating student accounts for CoSpaces Edu.
To start working with your students in CoSpaces Edu, you will first need to create a Teacher Account at this link. Once you’re logged in, click on Classes in the sidebar, and then on + Create Class. Choose a name for your class, click create, and you will be provided with a 5-character class code that students will enter when they create student accounts.
At the time of writing, CoSpaces does require each student to have their own account. These are most easily created using the appropriate sign-in partner (Microsoft, Google, Apple) for students’ school-issued email accounts to avoid creating another password for students to remember. However, they do also provide the option to create accounts with a name, username, and password, which you could anonymize and document as needed. If students already have a CoSpaces account, they can simply click on Classes in the sidebar, and then click on Join Class where they will enter your unique class code.
Once your CoSpaces Class is up and running, you can add assignments as you wish! If you are using the free version of CoSpaces you are limited to one assignment at a time; however, any level of the pro version removes this limit. As the teacher, you are able to view (and edit) students’ work in real time, providing valuable opportunities for formative assessment and troubleshooting.
You also control whether students are able to generate a Share link to their CoSpace. Note, however, that students’ names will appear with their shared CoSpaces. To maintain students’ privacy, you may wish to instead copy students’ work to your personal CoSpaces account and generate a share link from there, adding as much of students’ information to the project as is appropriate.
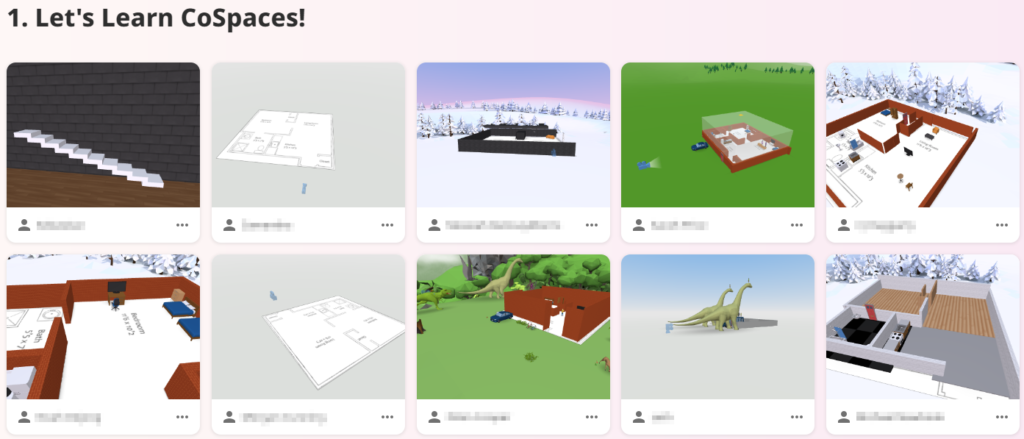
Another valuable resource for teachers is the CoSpaces Gallery. Not only can these 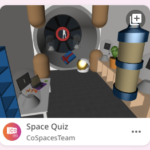 publicly-shared CoSpaces be a source of inspiration for projects you might assign yourself, many Gallery projects can be remixed and and used as an assignment starter for students. To do this:
- Click on a gallery project that has a plus-sign inside two squares in the upper-right corner.
- On the project page, click on that symbol and then click Remix which will add an editable copy of the project to your own CoSpaces.
- Navigate out of the public Gallery and click on CoSpaces in the left sidebar. You should
 now see the project you made a copy of.
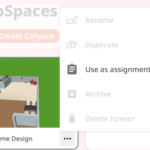
 - Click on the three dots beside the project title, and click on Use as assignment.
- In the dialog box that opens, decide which class you’d like to assign it to, then enter a title and a set of instructions for students to follow in completing the assignment.

Now you’re ready to jump into the deep end with CoSpaces Edu. We’d love to see what you and your students create! Make sure to tag us (@steam3dmakerlab) in your social media posts, or message us directly with any questions we can help answer. Happy making!